

Draw a palm tree in just eight easy steps! Everyone requires a break to get out of it all occasionally. About vacation, nothing beats relaxing on a tropical beach with a tall glass of fruit punch! You may also learn many things cartoon drawing, easy scary drawings, pencil drawing, cool things to draw, scary drawing, creative drawing, and flower drawing.
Few things evoke the excitement of a tropical vacation, like the sight of a magnificent palm tree. If you plan on low sands to relax or love to see palm trees, accomplished you feel it would be entertaining to know how to remove one? This step-by-step focus on removing a palm tree in 8 steps will show you that drawing a palm tree can be an easy and relaxing activity!
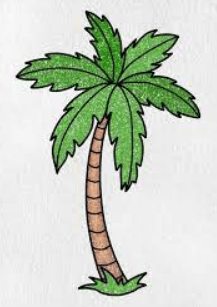
How to draw a palm tree – allow’s contact to form
Stage 1
We’ll start simple for this first step in removing a palm tree. To get started, draw a thin, curved line. This will form the patch of sand from which the palm tree will later grow. You can make the line look like our example, but you can change the look of the line a bit if you want!
Step 2: Now, draw some grass.
Using the line you drew in step one, you can add grass to your palm tree drawing. This will be composed of irregular lines that vary in length. You can roll them a bit to give them movement, as seen in the image.
Step 3: Next, draw the trunk of the tree.
A palm tree would not be a palm tree if it did not have the characteristic long trunk for which it is well known. For this reason, we should add a trunk to your drawing of the palm! Draw two long, curved lines from the jagged lines of grass to form the trunk as it appears in our reference image. Once you’re happy with how the trunk looks, we can carry on to the following degree.
Step 4: Start drawing on the leaves of the tree.
For the next step in our guide on how to draw a palm tree, we’ll start drawing the large leaves at the top. In this step, follow the guide image very closely, which will help you draw more leaves later. You will draw this part of the leaves singing very curved lines above the ones you drew on the tree trunk in the previous step.
To make it easier for you, try to determine a center point where all the lines should start. The reference image will give you where to place this center line. The lowest-running row of leaves will have one row slightly more indented than the others. This step can be tricky, but if you follow the image carefully, I know you can do it!
Step 5: Now draw more leaves.
Using the lines you drew for the leaves in the previous step, you can now draw more leaves for your palm tree design. From the end of each line, draw another line toward the center. The image will show you which lines should be smooth and jagged. Once the sheets fit you, we can move on to step 6!
Step 6: Now, you can draw coconuts and details.
For this step in our guide on drawing a palm tree, draw circular shapes between the leaves near the center of the top of the trunk. They will fill in the spaces between the trunk and the leaves that were left over from the previous step. Then, draw horizontal lines across the palm tree’s trunk to give it texture.
Step 7: Draw some final details.
Your palm tree drawing looks great! Before moving on to the coloring, add some lines to the leaves for more texture and vibrancy. You can also add fun details that look cool!
Step 8: Finally, color your palm tree
I hope you’re ready to have even more fun because now that your palm tree drawing is complete, you can have fun coloring it! This is a stage where you can let your creativity shine and choose your favorite colors for the finish. We show you one way to color it, but you must follow your creative instinct.
You could even draw a beautiful ocean background with a sunset! If I were to color this, I would use watercolor paints to make it look beautiful and soft. This is just one of many options, so what colors and media will you choose for your drawing?